How to Diagnose RV Plumbing Issues Like a Pro

RV plumbing problems rarely appear at a convenient time. A faucet starts sputtering in the middle of a trip. The water pump cycles at night. A mystery puddle shows up under a cabinet. The good news is that most RV plumbing issues follow a pattern, and you can track them down without guessing or tearing the rig apart.
The key is to diagnose the system in order. RV plumbing is compact, but it has several moving parts: the fresh water tank, city water connection, pump, water heater, faucets, drains, vents, gray tank, and black tank. When one part acts up, the symptom can show up somewhere else.
This guide walks through a practical process for finding the source of common RV plumbing issues, from low water pressure to leaks, pump problems, odors, and slow drains.

Start by identifying which plumbing system is acting up
Before opening cabinets or pulling access panels, narrow the problem to one side of the system.
RV plumbing has two main sides:
Fresh water side | Drain and waste side |
Fresh water tank | Sink drains |
City water inlet | Shower drain |
Water pump | P-traps |
Water heater | Gray tank |
Faucets and toilet supply | Black tank |
PEX lines and fittings | Tank vents |
A leak under the kitchen sink may come from the pressurized water line, the drain trap, or even water running from another area. Low pressure at the shower may come from the pump, a clogged fixture screen, a kinked hose, or a water heater bypass valve in the wrong position.
Start with three questions:
Does the problem happen on city water, pump water, or both?
Does it happen at every fixture or only one fixture?
Is the issue on the supply side, the drain side, or both?
If a problem only happens when connected to city water, focus on the campground spigot, pressure regulator, city inlet, and check valve. If it only happens when using the pump, focus on the fresh tank, pump, pump filter, suction line, and pump pressure switch.
If every faucet has the same symptom, the problem is likely upstream. If only one faucet acts up, inspect that fixture first.
Use a simple diagnostic kit
You do not need a full service truck to diagnose most RV plumbing problems. A small kit can save hours of frustration.
Keep these items on hand:
Flashlight or headlamp
Dry towels or paper towels
Adjustable wrench
Screwdriver set
Water pressure gauge
RV water pressure regulator
Food-safe hose washers
Plumber’s tape for threaded fittings
Small mirror
Bucket or shallow pan
Non-contact moisture meter, if available
Replacement faucet aerators and washers
Disposable gloves for waste-side work
A flashlight and dry towel are often the most useful tools. Wipe the area dry, turn the water back on, and watch closely. Fresh drips tell the truth.
A slow leak can travel along a pipe, wire, or cabinet seam before it falls. Always trace water upward and backward from the puddle.
Diagnose low water pressure
Low water pressure is one of the most common RV complaints, and it can have several causes. The best way to diagnose it is to compare fixtures and water sources.
Check the campground spigot first
If you are connected to city water, test the spigot before blaming the RV. Disconnect the hose, point it safely away from people and gear, and turn on the water briefly.
A weak flow at the spigot means the problem is outside the RV. A strong flow means the problem is likely in the hose, regulator, filter, inlet, or internal lines.
If you use an inline filter, remove it for a quick test. Filters can clog with sediment and cut flow dramatically.
Inspect the hose, regulator, and inlet
Kinked hoses are easy to miss, especially when they run behind the RV or under a slide. Straighten the hose and check both ends for damaged washers.
A pressure regulator protects your RV plumbing. Many RVs should not be exposed to high campground pressure, so a regulator is smart. If pressure is low, try a known-good regulator or test with a gauge. Do not run without protection unless you know the supply pressure is safe.
The city water inlet can also be a restriction point. Some inlets have screens that catch debris. Remove and clean the screen if flow has dropped suddenly.
Compare hot and cold water
Turn on cold water at several fixtures, then hot water.
If cold water flows well but hot water is weak, check:
Water heater bypass valves
A partially closed hot water valve
Mineral buildup in the water heater
A clogged faucet cartridge on the hot side
A stuck check valve near the water heater
If both hot and cold are weak everywhere, look upstream at the supply source, pump, tank, filter, or main line.
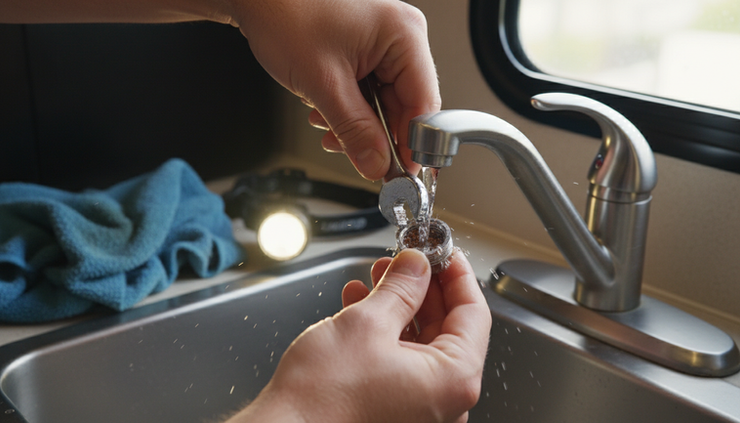
Clean the faucet aerators
If only one sink has poor flow, unscrew the aerator at the faucet tip. Sediment, plastic shavings, and mineral flakes often collect there. Rinse it, reinstall it, and test again.
For the shower, check the shower head screen and hose. Some RV shower heads also have shutoff buttons that can restrict flow if they stick.
Diagnose pump problems
An RV water pump is designed to turn on when pressure drops and shut off when pressure builds. If it behaves differently, the pattern points to the cause.
The pump runs but no water comes out
Start with the fresh water tank. Make sure it has enough water. Tank sensors can be inaccurate, so do not rely only on the monitor panel.
Next, check the pump inlet strainer. Many RV pumps have a small clear bowl or screen near the inlet side. If it is clogged, the pump may run but struggle to pull water.
Also check for air leaks on the suction side. A loose fitting between the tank and pump can let the pump pull air instead of water. Look for bubbles, loose clamps, cracked lines, or a winterization hose valve left open.
The pump cycles when no faucet is open
This usually means the system is losing pressure. Common causes include:
A small leak on the pressurized side
A dripping faucet
A toilet valve that does not fully close
A bad pump check valve
A loose fitting behind a wall or cabinet
A water heater pressure relief valve weeping
To diagnose it, turn the pump on until it stops. Make sure every faucet is closed. Listen. If the pump clicks on briefly every few minutes, pressure is leaking down.
Now inspect every fixture. Touch supply lines, fittings, and the floor below them. Use a dry paper towel around fittings because it shows moisture fast.
If you find no visible leak, isolate sections if your RV has shutoff valves. If the cycling stops when the water heater is bypassed, look around the heater, check valve, and relief valve. If it stops when the toilet supply is off, inspect the toilet valve.
The pump will not turn on
Check power before replacing the pump. Confirm the pump switch is on. Check the fuse in the 12-volt distribution panel. Listen near the pump while someone turns the switch on.
If there is no sound, test for loose wires, corroded connectors, or a failed switch. If the pump hums but does not move water, it may be stuck, clogged, air locked, or worn out.
Diagnose leaks without making a mess
Water leaks need quick attention because RV floors, wall panels, and cabinets do not handle moisture well. The goal is to find the source before removing parts.
Separate supply leaks from drain leaks
A supply leak appears when the water system is pressurized. It may drip even when the sink is not being used.
A drain leak appears when water goes down a fixture. The area stays dry until you run the sink, shower, or toilet flush.
Try this test:
Dry the area completely.
Turn on the pump or city water, but do not run any fixtures.
Watch for new moisture.
If it stays dry, run one fixture at a time.
Check under and around the drain after each test.
This method keeps the diagnosis clean. It also prevents the common mistake of tightening the drain when the supply fitting is the real problem.
Look at fittings first
Many RVs use PEX tubing with crimp, clamp, or threaded fittings. Fittings can loosen from vibration, winter freeze damage, or repeated temperature changes.
Common leak points include:
Under sink connections
Toilet supply lines
Shower valve access panels
Water heater connections
Low-point drain caps
Pump fittings
Outdoor shower valves
City water inlet fittings
When tightening threaded plastic fittings, use care. Overtightening can crack them. Snug is usually enough.
Check the water heater area
Water near the water heater can come from several places. Do not assume the tank is bad.
Inspect:
Cold inlet fitting
Hot outlet fitting
Drain plug or anode rod
Pressure relief valve
Bypass valves
Exterior compartment seams
Nearby plumbing lines
Turn off the water heater and let water cool before draining or servicing it. If the heater has been on, hot water and pressure can cause burns.

Diagnose drain and tank issues
Drain problems feel simple, but the cause is not always a clog. RV drains depend on traps, vents, tank condition, and slope.
A sink or shower drains slowly
Start with the strainer. Hair, food particles, soap residue, and grease can slow flow near the drain opening.
Next, check the P-trap. Place a pan underneath, loosen the trap, and inspect for buildup. Avoid harsh drain chemicals unless the product specifically says it is safe for RV plumbing, tanks, seals, and valves.
If multiple drains are slow, the gray tank may be full, the vent may be blocked, or the line may have buildup.
Water backs up into the shower
In many RVs, the shower drain is one of the lowest drain points. If gray water backs up into the shower pan, the gray tank may be full or draining poorly.
Check the tank level, but know that sensors often read wrong when coated with residue. If the gray tank valve is open at a full-hookup site, solids and grease can still collect in the tank. Many RV owners keep the gray valve closed, then dump when the tank is partly full so the water carries debris out.
The RV smells like sewer gas
Odors can come from several spots.
Check the P-traps first. If a sink or shower has not been used, the trap may be dry. Run water into the fixture to refill it.
RV sinks may also use air admittance valves under the counter. These small one-way vents let air into the drain system. If one fails, odors can escape into the cabinet.
For black tank smells, check the roof vent, toilet bowl seal, toilet base seal, and tank treatment habits. The black tank needs enough water to keep waste from drying and building up. Flushing with too little water is a common cause of odors and clogs.
Diagnose toilet problems
RV toilets are simple, but they connect to both fresh water and the black tank. That makes diagnosis important.
The toilet bowl will not hold water
A small amount of water in the bowl helps block odors. If it leaks away, the blade seal may be dirty, dried, or damaged.
Clean the seal according to the toilet manufacturer’s instructions. Sometimes debris sits on the seal and prevents it from closing. If cleaning does not help, the seal may need replacement.
Water keeps running into the bowl
This points to the water valve or pedal mechanism. Turn off the pump or city water to prevent overflow, then inspect the valve. Cold weather damage can crack toilet valves, especially if the RV was not winterized well.
The toilet burps when flushed
A burp can mean pressure is building in the black tank. The tank may be full, clogged near the drop pipe, or poorly vented. Stop flushing until you confirm the tank level. Adding more water to a blocked black tank can make the problem much worse.
Use winterization history as a clue
Freeze damage is one of the biggest causes of RV plumbing failures. If a problem appears on the first trip after storage, think about winterization.
Look for:
Cracked plastic fittings
Split faucet cartridges
Leaking toilet valves
Damaged water pump heads
Cracked filter housings
Drips at low-point drains
Water heater damage if it was not drained
A line can freeze and crack in a hidden area, then leak only when pressure returns. If the pump cycles and no obvious leak appears, inspect every cabinet floor, storage bay, and access panel. Use your nose too. Damp wood and trapped water often have a distinct musty smell.
Follow a pro-style troubleshooting order
A professional diagnosis is not about fancy tools. It is about order. Work from the simplest and most likely cause to the harder one.
Use this sequence:
Confirm the symptom.
Identify whether it happens on pump water, city water, or both.
Check whether it affects one fixture or the whole RV.
Inspect visible fittings and valves.
Test supply pressure and flow.
Test drains one fixture at a time.
Isolate sections if shutoff valves are available.
Repair the confirmed cause.
Test again under the same conditions.
10. Dry the area and recheck later.
That last step matters. After a repair, pressurize the system and leave it sitting for a while. Run hot and cold water. Fill and drain the sink. Flush the toilet. A quick test can miss a small leak.

Know when to stop and call for help
DIY diagnosis can solve many issues, but some problems deserve a qualified RV technician or plumber familiar with RV systems.
Get help if you find:
Water inside walls or under flooring
A suspected cracked water heater tank
Electrical wiring near active leaks
Repeated pump cycling with no visible source
Black tank blockage that will not clear safely
Damage from freezing across several fixtures
Soft flooring, mold, or long-term water intrusion
Also stop if a repair requires cutting into sealed areas and you are not sure what is behind the panel. RVs pack plumbing, wiring, ducting, and framing into tight spaces.
What a successful diagnosis looks like
A good diagnosis ends with a clear cause, not a guess. You should be able to say, “The pump cycles because the toilet valve is leaking,” or “The bathroom sink drains slowly because the air admittance valve failed,” or “Hot water pressure is low because the bypass valve is partly closed.”
Once you know the cause, the repair becomes much easier.
RV plumbing rewards patience. Slow down, separate the fresh side from the drain side, test one source at a time, and follow the water. That method will help you fix small problems early and avoid turning a drip into a trip-ending repair.


Comments